Fabrication Tolerances for Dimensional Variance in Sheet Metal and Machined Parts
Bending Tolerances
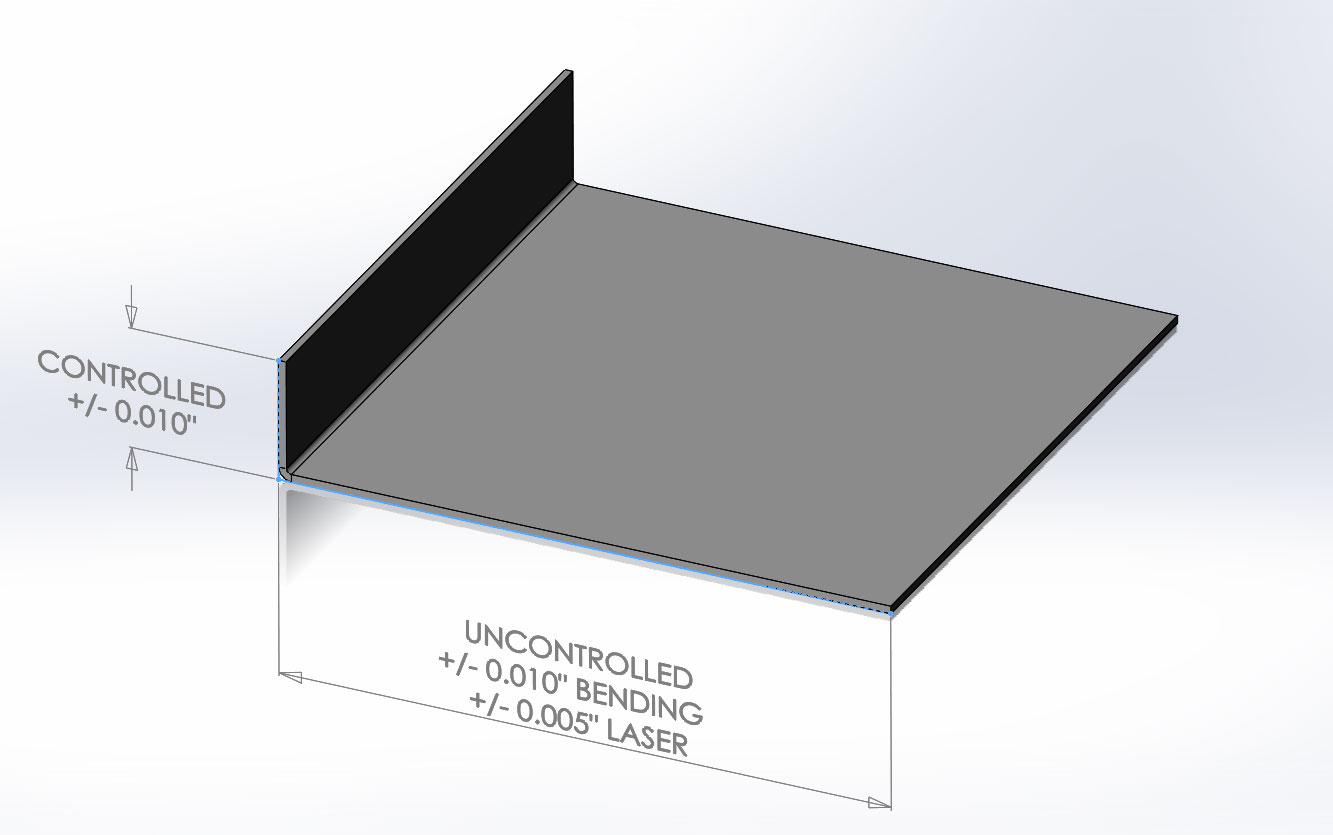
Bends (and their corresponding tolerances) either pertain to a controlled dimension, or an uncontrolled dimension.
Controlled Vs Uncontrolled Dimensions
Controlled dimensions refer to the length of the flange of any bend. Controlled dimension bend tolerances are standalone, and therefore do not need to be considered in relation to any other bend.
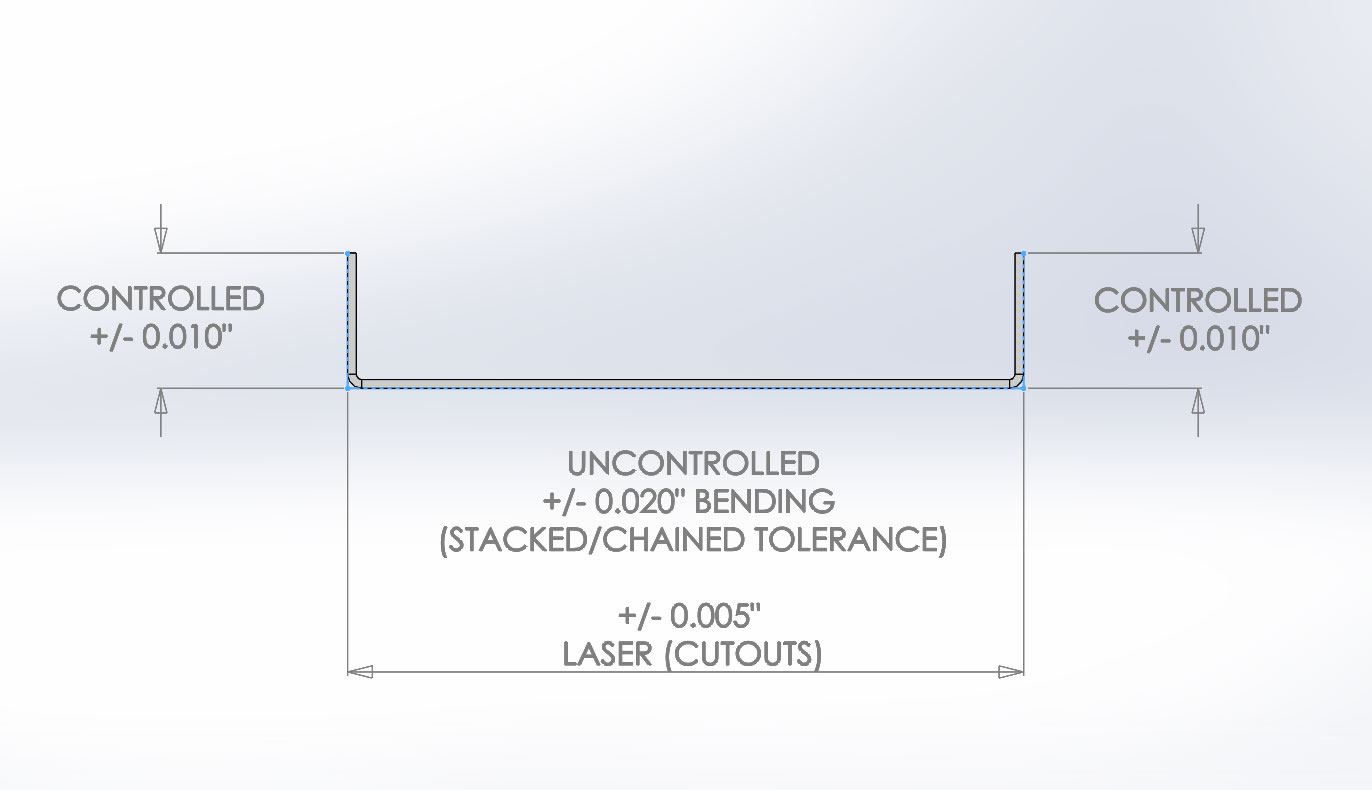
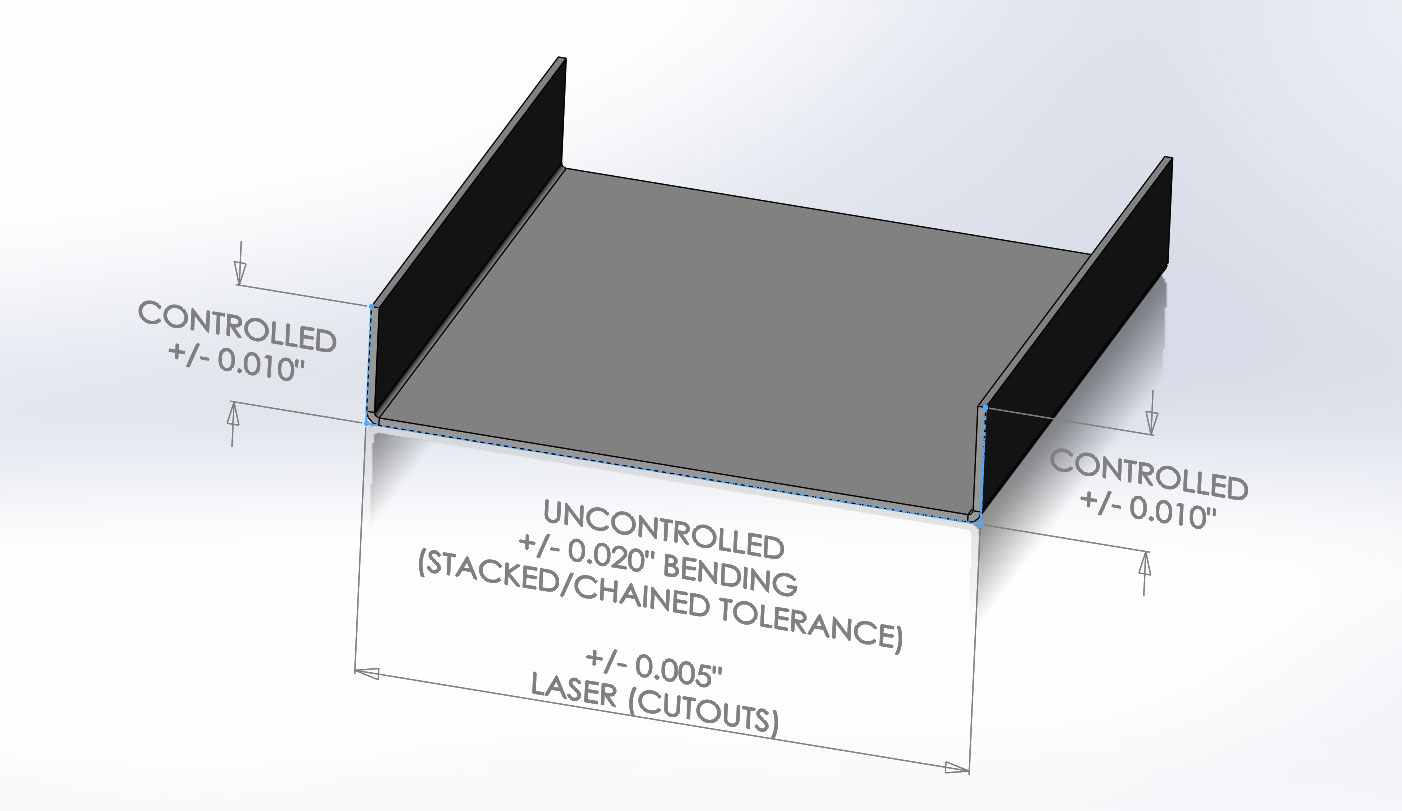
Uncontrolled dimensions, on the other hand, refer to the sections of the part where the bend originated from. Uncontrolled dimensions contain two different categories of tolerances:
1) All manufacturing tolerances used up to that point (such as laser-cutting tolerances, welding tolerances and more)
2) All bend tolerances for the entire part, added together
We call this an uncontrolled dimensions because there are additional tolerances to consider. All of those tolerances are added together, or put another way, they are stacked tolerances.
Please refer to the diagrams for more information.
| Bending Process | Tolerance | |
| Bend angle | ± 1 degree | |
| Bend length | ± 0.010" | 0.25mm | |
| Press brake bend length | ± 0.010" | 0.25mm Per bend for controlled dimension |


