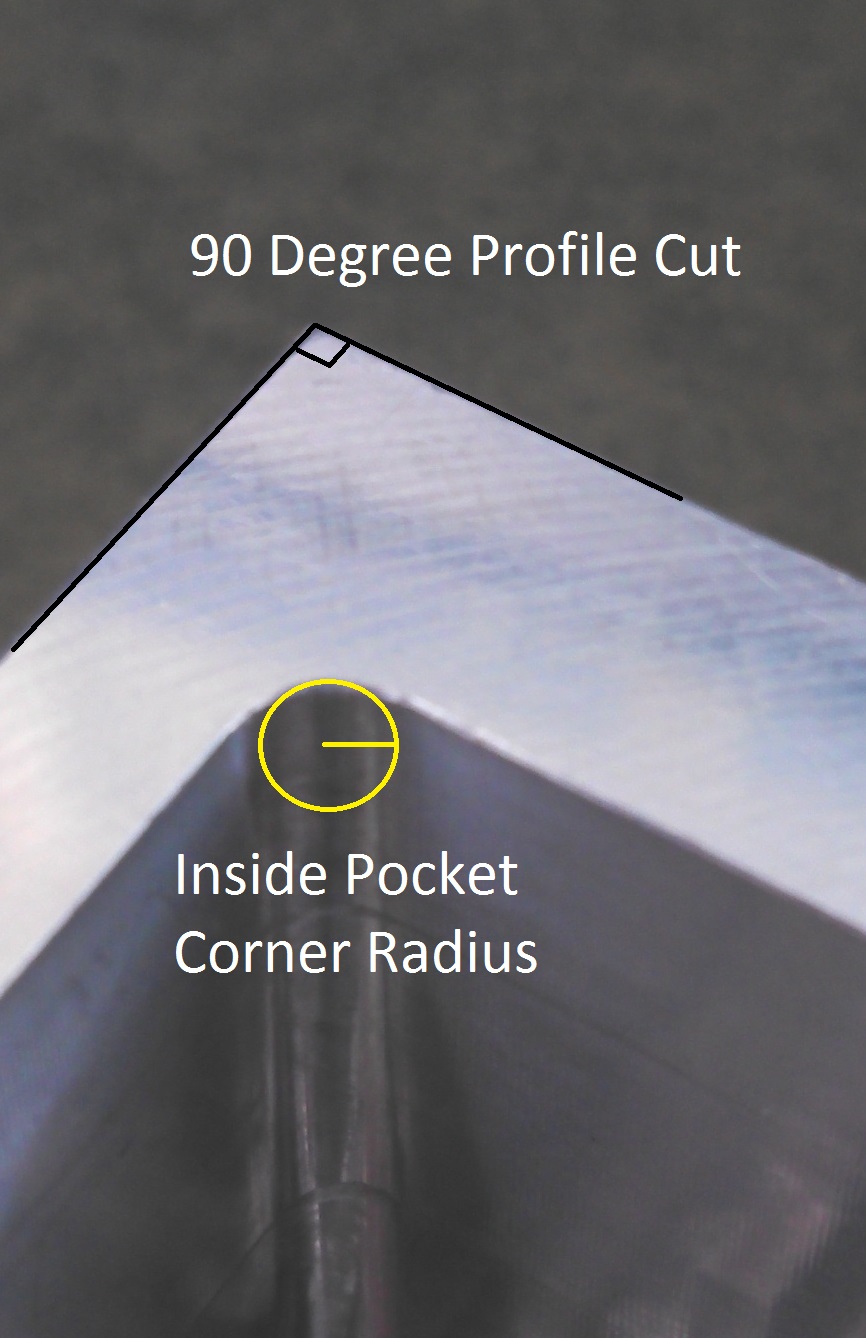
When it comes to metal manufacturing, every type of machinery will have some limitations on the size, angles, curves and contours that can be achieved. CNC machining is no different. A CNC Machining corner radius refers to the internal radius of the corners of your part.
Beyond the size constraints of what CNC machinery can accommodate, another important consideration is corner radius. With CNC machining corner radius, it is generally not possible to achieve a perfectly sharp angle on internal corners. The corner radii you choose for your design can have a dramatic effect on how efficiently it can be machined – and the final finish quality of the machined part.
This blog will delve deeper into the concept of corner radius in CNC machining, and how to choose the ideal corner radii for your requirements and budget.
What is Corner Radius?
For CNC machining, corner radius refers to the internal radius of the corners of your part.
All CNC milling tools have a cylindrical shape and will create a radius when cutting an internal pocket. The radius of the tooling employed during the CNC machining process will determine what corner radii are possible.

Why Does Corner Radius Matter?
Corner radius is immensely important for CNC machining, because it will have a direct effect on the quality of the machining that can be achieved, as well as the amount of time it will take to machine a part.
When CNC machining internal features, the corner radius you attempt to achieve will impact the finish of the inside of your part. Trying to obtain a tight corner radius relative to the tool radius will increase how much the tool engages with the interior sides of your part, which will cause a decrease in finish quality.
It is possible for the path of the tool to turn at 90-degrees to create a corner radius that is equal to the tool radius (the minimum possible). However, this is not recommended because it will cause a large amount of stress to both the tool and part. When the tool reaches the corner, it will need to stop and pivot. This has the chance to create chatter marks from the increased vibration of the tool, and will slow down cutting time. It is possible to use a smaller tooling to achieve tighter corner radii, but smaller tooling comes with some caveats.
Larger tooling produces larger corner radii, but runs faster, which decreases the time it takes for the part to be machined. Therefore, smaller tools will lead to increased costs. Smaller tools are also more limited in the feature depth (pocket depth) they can achieve. This creates an inverse relationship between corner radii and feature depth.
In short, using the largest radii possible for your design will both increase surface finish quality, and reduce machining costs. Larger tools that create larger radii run faster and decrease costs.

Minimum Requirements for Corner Radii
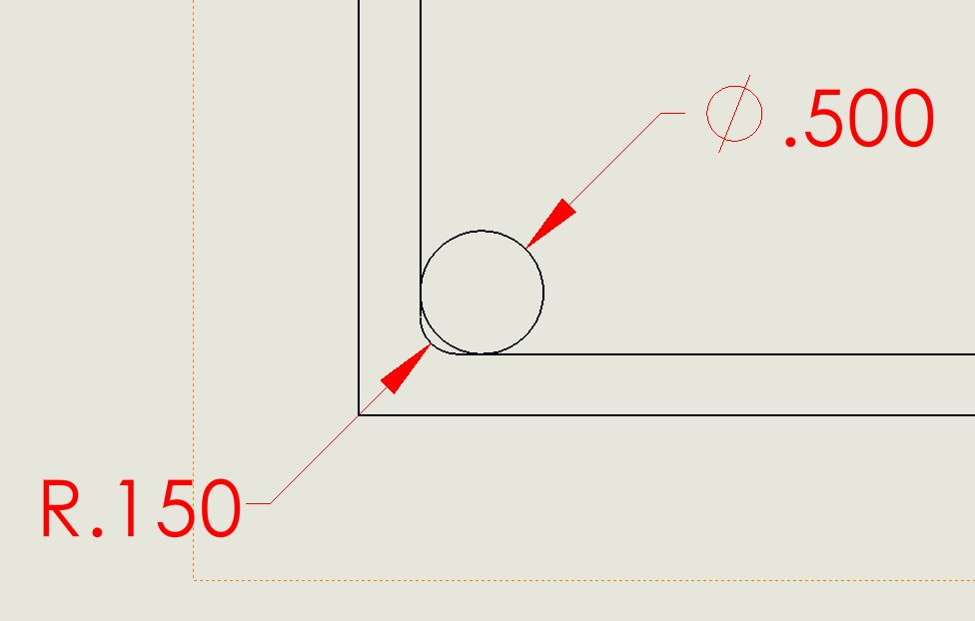
There is a minimum requirement for corner radii, as the tool is unable to physically fit into a 90° corner that is smaller than its radius, as shown in the image below.

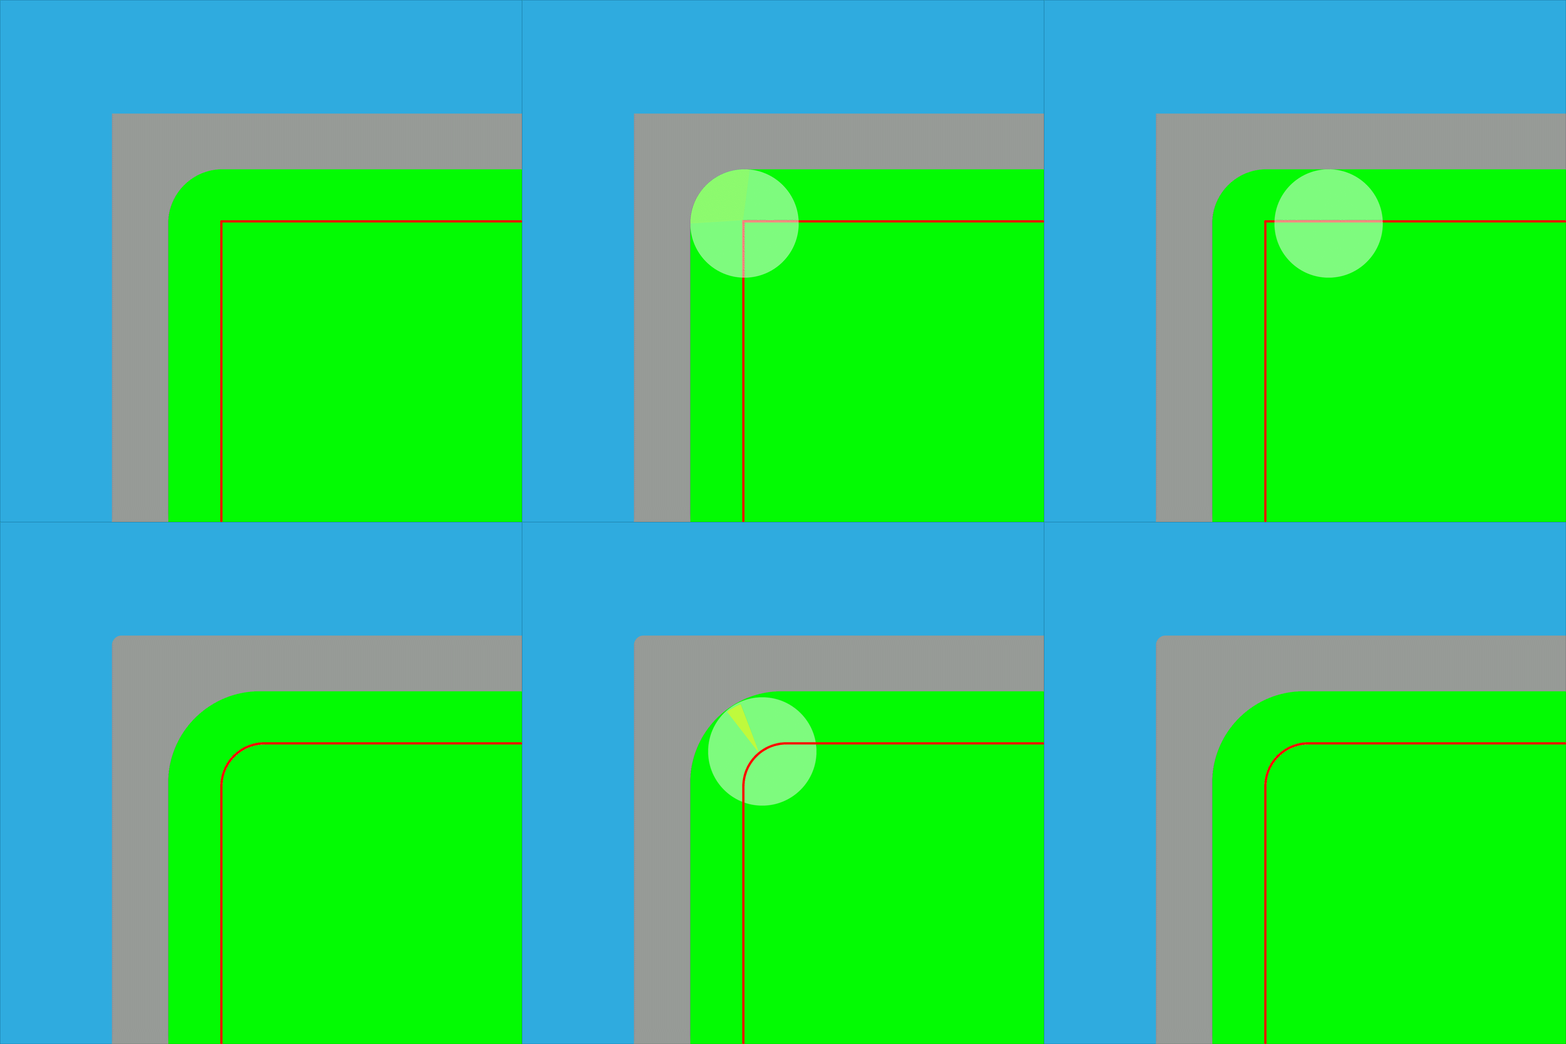
To gain a better understanding for why the tool engagement increases, it is beneficial to look at the toolpaths required to form sharp corners. Here’s a gif to help illustrate tool engagement based on corner radius.

The gif shows two different corner radii. The red line indicates the tool path, and the yellow highlighted area indicates tool engagement.
In the first instance, the tool path is 90 degrees, which shows a wide yellow area for tool engagement.
The second sequence of the gif shows a more rounded toolpath, which shows a smaller yellow area, which represents less tool engagement. The increased tool engagement places more stress on the material and tool, which results in lower surface finish quality.
This second sequence in the gif illustrates a drastically increased corner radii from a much larger arc on the tool path. A larger corner radius greatly decreases the cutting forces on the tool and improve the finish. It would also allow for reduced cutting time and therefore reduced cost.
Comparing Different Corner Radii Using the Same Tool
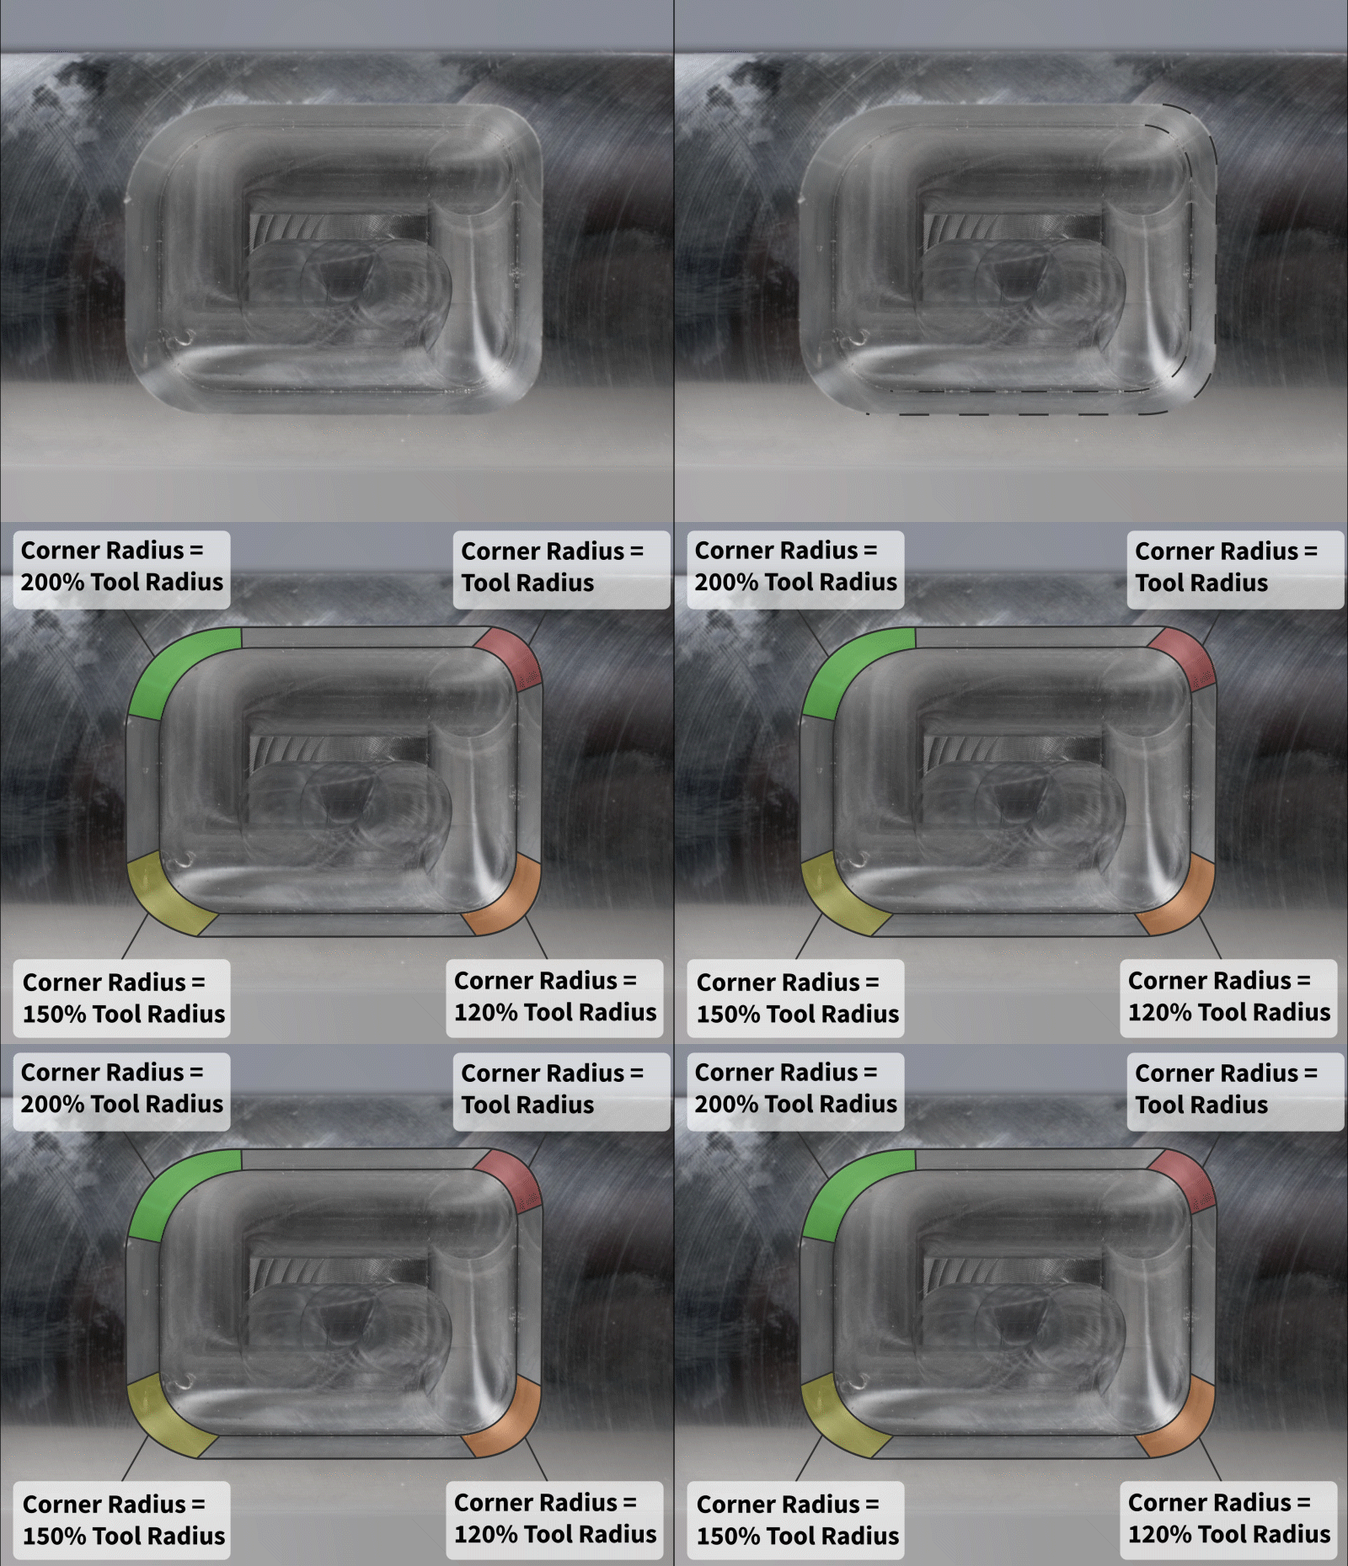
Below is a gif of a sample that shows four different corner radii, each achieved using the same tool.

Green = the largest angle for the toolpath, making it the ideal option
Yellow = This corner radius is adequate, however, 200% tool radius is best.
Orange = The 120% tool radius is not ideal.
Red = This corner radius is not recommended, as it will result in poor surface quality finish.
How Do I Choose a Corner Radius?
As covered in this blog post, the corner radius you choose can have a dramatic effect on how efficiently your part can be machined, as well as the quality output achieved.
The chart below outlines the minimum radius values we recommend for a feature depth.
The far column, Recommended Minimum Radius means we have processes for these values that work well.
Minimum radius is the theoretical minimum we can achieve, but that radius ranks below the recommended radius. If you choose the minimum radius, the cost will increase and surface finish quality may suffer.
We always recommend keeping radii as large as possible.
| Feature Depth |
Minimum Radius |
Recommended Minimum Radius |
| 0.47” (11.938mm) |
0.016” (0.406mm) |
0.031” (0.787mm) |
| 0.75” (19.05mm) |
0.032” (0.813mm) |
0.063” (1.6mm) |
| 2” (50.8mm) |
0.063” (1.6mm) |
0.094” (2.388mm) |
| 3” (76.2mm) |
0.125” (3.175mm) |
0.15” (3.81mm) |
| 3.25” (82.55mm) |
0.250” (6.35mm) |
0.275” (6.985mm) |
| 4.25” (107.95mm) |
0.3” (7.62mm) |
0.325” (8.255mm) |
| |
|
|
Conclusion
Ultimately, when designing your CNC machined parts, you will need to balance your requirements with the constraints that come from tooling. And, of course, budget will often come into play.
The goal of this blog is to explain how corner radii is an important consideration when creating your CNC machined part and enclosure designs, as the corner radii you choose will directly affect the machining time and project cost.
Still stuck? Don’t worry – our CNC Engineering & Design Services team is here to help. Contact us to discuss your design and your end requirements. Our mission is to find a solution that will work for you so that you can keep your projects moving and meet your deadlines.


